Showing posts with label Pinterest Projects. Show all posts

Saturday, April 14, 2012

Dollar Store Upcycle Rope Vase

You can surely tell that it is spring!  Things are crazy busy all the time.  The yard work and flowerbed preparation has begun.  Together with appointments and just my all around struggle with fibromyalgia, I feel like I am either spinning out of control or stuck in bed.  It greats frustrating at times and I just don't feel that my long list of projects will ever reach its end.

I have, however, been able to fit a few small ones in here and there.  The lastest is an upcycle rope vase which was inspired by something that I seen on Pinterest, of course.  I have a box full of old glass vases from old flower arrangements or dollar/thrift store finds.  I have never been able to just get rid of them.  I have no idea why.

My solution to this problem is taking a few of them and wrapping them in jute rope.  That way they can match on the exterior, but it doesn't matter what size or color they are on the inside.  It's all the rage to have mismatched shapes and sizes.  So, I began.

On a recent trip to the local one dollar shop, I was able to find skeins of rope.  It is not as thick or dark in color as some of the more expensive choices.  But, it was only ONE DOLLAR for each skein.


A little Mod Podge and the vase, and I am ready to begin.

I started by placing a piece of waxed paper on my work surface.  I could see this was going to get real messy, real quick.  I then began putting a little Mod Podge (glue) not only on the bottom of the vase, but on the rope as well.  I held the end to the vase with my finger and began slowing wrapping and stacking the rope. Remember I told you it would get mess, well it did.

Make sure that you keep glue on the vase and rope throughout the process.  It makes the rope stay in place a little better because it keeps it tacky.  Also, keep an eye on your project so that you are making sure to push the rope together (downward).  You don't want too much space showing through.


All was going just as planned until I got to this point.  The extreme curve in the vase turned out to be a bit tricky.  I solved the problem by adding some rope up the curve and keeping it as uniform as possible.  It proved difficult to keep the rope pushed down so that space wouldn't show, so I gave up on that through this point.

Once I had it applied the best I could.  I stopped and let that much dry overnight.  Don't cut the rope, just make sure it isn't touching the rest of the project.

The next day, I began applying the glue and rope the rest of the way up the vase.  At the top, I overlapped the rope a few times to give it a wider looking opening.  A trick of the eye.  Cut the rope and glue it down as good as possible.  Don't worry if it comes up a bit, you can cut it off closer after it dries.

I didn't forget about the mess around that curve.  Now you can go back to them.  Apply a good coat of glue over the rope that was applied before.  Fill in the spaces with more rope.  Stack it up as high as you want for design purposes, or just wrap it to fill in.  Use the same procedure for cutting the end as you did on the top.  


After you have let it set overnight, go back with some scissors and cut off the excess rope and any annoying frays.  The dollar store rope will have a lot more of those than the more expensive rope.  I used just over half of one skein of jute rope for this project.  So I spent less than one dollar for this vase.

WHAT I LEARNED FROM THIS PROJECT:
  • Patience...alot of patience.
  • Don't use a vase with an extreme curve in it if you didn't learn the first point (patience).
  • Don't be afraid to stack the rope up for a more 3 dimensional design.
  • Be prepared to scrub and peel Mod Podge off your hands and nails for a while...especially if you have long fingernails.
Go out there and create your world!  It doesn't take alot of money, nor does it take alot of artistic ability.  If it looks good to you, then you are successful!

I will be making more of these and maybe use them as gifts.  I am always looking for a last minute gift for someone for a housewarming, birthday, etc.

Please leave me a comment and let me know how your project turned out.  Share what you learned from the process.


Monday, April 2, 2012

Kitchen Organization Part II

I finally completed my label project for the kitchen!  Well, at least for now.  As promised a few days ago, I am here to share my results.  I hope that it inspires you, at least a bit.


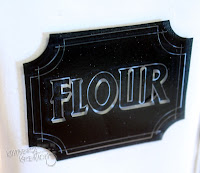
As you can see, they look great on the canisters and up close, but at a distance they are still hard to read when there is product inside.  I like them, however, as I stated before, I would use a different font the next time.  Live and learn.  But look at all the extra room I have in my cabinet!  That is exciting.

Go out there and create your world.


Saturday, March 31, 2012

Kitchen Organization

Where, oh where have I been?  Well, I could tell you that I have been creating and have a load of new projects to share with you, but that wouldn't be entirely the truth.

I have been continuing my quest to make more organized space in my home.  I have been doing let's say research too.  Ok, you got me, I have been on Pinterest....ALOT!  But, I have been getting inspiration.  That counts, right?

My latest venture has taken me back to my kitchen.  I decided to purchase some slide transfer paper and make some labels for an old set of canisters I have had since I first got married nearly 22 years ago.  These canisters, a three piece set, came with an bread box.  It has never been updated and is beginning to look hideous in my updated kitchen.

The first step in the project was to find some affordable slide transfer paper.  I went on a few websites after Googling "slide transfer paper".  The best place I found to purchase it was on Ebay, of course.  In a few days, it was delivered right to my door. 

While I was waiting for the paper to arrive, I needed to find just the right printable labels.  I found a great place to get these free printables at I Heart Organizing.  They looked great with one drawback.  I wanted different sizes and words all on one sheet to maximize the paper space.  So, I downloaded the labels that I liked and went to my trusty Photoshop to incorporate the wording and sizes that I needed.

I printed out what I needed and began following the directions in preparing the slide transfers.  I got this information from a popular Pinterest site called The Painted Hive.  The free printables from these website have been trending on Pinterest for awhile.  The information on where to buy and how to use the slide transfer paper is easy to follow.


I will use the larger labels on some big glass canisters that I keep inside the cabinet.  I will be sure to post pictures of that process as well.


I liked the look of the labels and was happy to finally see this old set get an update.  However, I was a little bit disappointed when I actually put product inside the canisters.  It seemed, especially on the brown sugar canister, that my lettering blended in and became difficult to see.  If I where to do it again, I think I would choose a different font that is easier to see.


The final product, although not outstanding, turned out fairly good.  Now I think I will work on updating the box itself.  Maybe some white paint and a little distressing.


What I most learned from this project is that while on paper it may look great, I should look ahead at what the use of the project will be.  I am not overall disappointed.  And, anytime that you can complete a project and learn something new about the entire process, you are already ahead for the next project that comes down the line.  

Remember it is your world to create.  Sometimes we get caught up in what someone will think of a project when they first come into our home and see it.  This is not overall a bad thing.  We want others to appreciate our craftiness and compliment us on it.  However, I am a believer that you, the "artist", should be satisfied at the end of a craft project.  If you look at the project and know that it what you envisioned in your head when you began, then it is perfect.

So, go out there and create!


Friday, February 24, 2012

Magazine Files Repurposed

After completing the shelf unit in my dining room, I still wasn't quite as happy as I thought that I should be.  Every time that I walked by, the small, mismatched cookbooks just jumped out at me.  They were screaming for a solution to make them a beautiful as their surroundings.  My newest project emerged.

I didn't have any old magazine holders in the house, or they would have been recycled for the cause.  So, on a recent trip to Staples, I purchased some.  I paid $1.99 for a package of two (total cost approximately $1.00 each).  I had some leftover scrapbook paper from other projects, so that worked out well.


I layed the paper out and lay the magazine files on top.  Use a pencil to trace the shape onto the paper and cut.  Use Modge Podge, or similar decoupage medium to glue everything down.  I decided to put a heavy coat of Modge Podge over the entire thing when I was done, just to make it stronger.  I wanted to ensure that nothing came loose or ripped.

You could substitute Modge Podge with some watered down school glue (like Elmer's glue).  It would work just as well, and yield the same type of results.

I was able to get the smaller books organized, and hide some of the other mismatched books.  Now everything looks uniform and beautiful.  They aren't screaming at me any longer!

These magazine files can be used anywhere in the home.  If you have a space that needs a little organization and style, these would work out great.


Now on to the next project.  I wonder what it will be?!

Before I close this post, I thought that I would share another funny with you today...


Because I am addicted.  Not a bad thing...I get so much inspiration from the photos and ideas pinned by others.  It is a great place to gather a bunch of creative minds.  The sharing is great!


Pin It

Monday, February 20, 2012

Solution For Storing Cupcake Liners

I was feeling rather inspired today for some reason.  In my quest to get my home organized, I came up with a rather inexpensive project to solve a rather pesky problem in my kitchen.  I don't currently do a lot of baking, but when I do I tend to make cupcakes rather than cakes.  Most of the baking and candy making in my home gets done at Christmas time.  However, I do somehow always seem to collect cupcake liners.  They were wasting space in an entire drawer in the kitchen.  We can't have that.

Here my solution to just such a problem.  These jars can be used for many problem areas throughout the home.   You can adjust them to fit your needs in any room.  

I started by purchasing two glass jars with sealed lids.  I purchased two of them at Michael's.  They just happen to be on sale this week for $2.99. 


The larger one stands approximately 6-1/2 inches, the smaller one about 4 inches.  I also found a pretty scrapbook paper on clearance for 49 cents.  It is two sided, so if I get tired of the pattern, I can always flip the paper to recycle.  


As you can see, I have a lot of cupcake liners.
I used less than one sheet of 12" x 12" paper (only about 3/4 of a sheet).  I eyeballed and marked each sheet so that the lid wouldn't cut into the paper.  I then used a straight cutter and cut each sheet.  I then placed each sheet in its respective jar.  I used a small piece of tape on the inside to hold it.


Once I liked the look, I printed a couple of labels.  I glued them, but they could be stuck with a small piece of tape or removable tape that can be found with the scrapbooking supplies.


They came out beautifully.  (Sorry about the horrible photos...I was in a hurry)
Did all the cupcake liners fit?  Well, yes that did!!  I was able to make two stacks wide in the small container.  Problem solved!

On to the next project.
I would love to hear your comments on this project.  Be honest.


Pin It

Wednesday, February 15, 2012

My Jewelry Storage Solution

As promised, I am sharing on of my newest completed projects.  I love to make jewelry whenever I am able.  Sometimes my body and hands do not cooperate with me.  However, when I can, I try to design new pieces to go with outfits that I have.  It isn't always cheaper, but at least I have jewelry that not only I designed myself, but are specific for the clothing that I wear.

Here is what I started out with.  It is a large piece...about 28" x 33".  My workable area measures approximately 20" x 27".  I purchased this at Hobby Lobby on a half price sale, and it already had the cork board back!


Then I added some large and small push pins, wire, hooks and name tag clips.  That's right, I made name tag clips work to my advantage here.


And then, the final product.


Not sure that I am completely done with it just yet, but I don't think it looks too bad for my first attempt.  Now to make some more jewelry to get it filled up...LOL.

Stay tuned for more projects I am working on.  I know I am not even close to done just yet.


Pin It